
Noobs in Combat concrete battleship Mission Strategy Guide
Noobs in Combat concrete battleship is a fortified island defense scenario in the Pacific Front campaign. Players clear this platform by bombarding coastal batteries, bunkers, outposts, and airfields with heavy naval gunfire while keeping ships safely out of retaliatory fire.
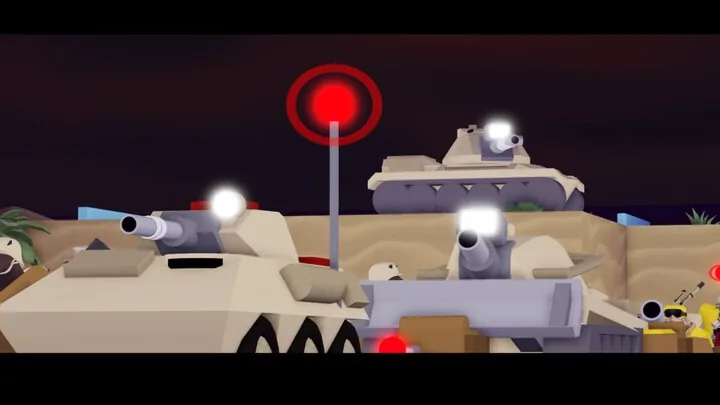
Noobs in Combat concrete battleship is a fortified island defense scenario in the Pacific Front campaign. Players clear this platform by bombarding coastal batteries, bunkers, outposts, and airfields with heavy naval gunfire while keeping ships safely out of retaliatory fire.
Concrete Battleship Mission Layout and Defense Platforms
The Concrete Battleship scenario in the Pacific Front campaign pits offensive forces against an island fortress built into a massive defensive platform. The map features hardened structures including concrete bunkers, outposts, an airport, mortar teams, mobile field guns, and coastal batteries that cover surrounding water tiles.
Coastal batteries represent the primary defensive threat on the water because their heavy cannons engage incoming naval vessels and fire upon landing units approaching the shoreline. Bunkers protect defending infantry squads from standard small-arms fire, often requiring multiple high-explosive hits or specialized clearing weapons to eliminate the troops fortified inside. Ground landings attempted before disabling these static positions face severe crossfire from mortar positions and hidden enemy defenders.
Tactical Approaches for Concrete Battleship
Choosing an attack vector depends on starting Tix and available unit rosters. The table below outlines three operational approaches for tackling the fortified island.
| Tactical Approach | Operational Focus | Primary Drawback |
|---|---|---|
| Long-Range Naval Barrage | Neutralizing coastal batteries, outposts, and bunkers from outside retaliation distance | Demands high Tix reserves for capital ships and requires dozens of turns of steady shelling |
| Carrier Air Strikes | Deploying dive bombers against static fortifications across sectors lacking anti-air defenses | Planes take multiple turn cycles to rearm, and aircraft suffer friendly damage when striking units directly beneath them |
| Combined Amphibious Landing | Transporting armored forces and infantry directly onto beaches using landing craft | Landing teams face lethal fire from active bunkers, field guns, and coastal emplacements |
Long-Range Naval Bombardment Strategy
The most reliable strategy for clearing Concrete Battleship involves deploying heavy naval artillery to dismantle defensive structures from extreme range. In community strategy discussions on the game wiki, player NICnoobfailure2000 documented clearing the map in 54 turns by adopting a method demonstrated by content creator Liam Wilson, which relies on continuous capital ship bombardment.
A dedicated battleship costs 240 Tix, making it an expensive investment that demands careful positioning. Players position these warships outside the firing arc of hostile coastal batteries, directing heavy shells into static installations. Priority targets include:
- Active coastal batteries, which neutralizes the primary threat to allied naval units.
- The island airport, which prevents hostile aircraft from maintaining reconnaissance over allied waters.
- Reinforced bunkers guarding beachheads and supply caches.
- Outposts and stationary defenses holding frontline chokepoints.
Warships require continuous visual spotting to strike targets at maximum range. Deploying a low-cost spotter or a seaplane grants line of sight across island tiles without exposing vulnerable naval vessels to hidden battery fire. Once visual contact is established, players systematically shell each objective until the defensive grid collapses.
Air Support and Bunker Clearing
Air power offers supplemental firepower against ground installations that sit outside naval sightlines. An aircraft carrier allows players to launch dive bombers across island sectors. In gameplay matches on this scenario, players exploit the absence of dedicated anti-aircraft guns across specific sectors of the island to bomb stationary guns and outposts freely.
Flight operations require attention to turn management and spacing. Dive bombers spend multiple turns traveling to their targets and returning to flight decks for fuel. Players must also monitor positioning during attack runs: if an aircraft delivers an ordnance strike on an enemy hex located directly beneath the plane, the attacking aircraft sustains self-inflicted damage alongside the target.
Bunkers require focused firepower. Standard main guns often need three separate hits to neutralize the infantry occupying a reinforced position. Deploying units equipped with flame launchers accelerates this process, forcing enemy infantry to abandon hardened emplacements rapidly.
Ground Assault and Securing Island Objectives
Once naval bombardment silences coastal batteries and beachhead bunkers, players can safely begin ground operations to secure map objectives. Premature landings frequently result in landing craft destruction and the loss of embarked units to mortar fire.
Landing craft deliver infantry squads, a sniper team, and an armored vehicle such as a battle tank onto the cleared shoreline. Ground forces advance systematically toward the airport and outposts:
- Keep infantry supported by a field gun to eliminate lingering enemy riflemen and bayonet-charging squads.
- Move snipers to rear elevation positions to provide overwatch and pick off remaining infantry squads at long range.
- Capture supply depots along the path to replenish munitions and repair damaged armor.
- Move into the central airfield and capture the final flag markers to end the scenario.
Next step
Eastern Front
Study objectives, enemy armor spawns, and logistical strategies to clear all six missions in the Eastern Front campaign.